We actually got a couple of inches of snow today! It started about 1 PM as nearly invisible flakes, and by 4 o'clock it was snowing to beat the band. I made it to the dump with another load of assorted nail-studded boards and half a truckbed of "it's biodegradable, so we can just leave it sit in a mound by the barn" bale wrap somebody didn't dispose of properly. Grrrr! Along with a few more odds and ends of things, I got another 420 lbs dropped off.
After a stop by the library and the grocery store, with the snow picking up, I headed home for evening chores pondering what to make for supper. Personally I love soup, and the slow cooker has had a workout these past few weeks, but I know T prefers to cut something with a fork at least a couple time a week so....
I had some chicken defrosting, but not a clue what I was going to do with it. Our usual fallback meal is stir fry, but I wasn't in the mood. After some browsing around, I decided to experiment. T says this is definitely repeatable, so I figured I'd share.
Barbecue Chicken Breast w/ Jalapeno Beans
1T. oil
3 small/med sized onions
2 chicken breasts
1/2 container honey mustard barbecue sauce (or to taste)
5 or 6 (more or less if you like spicy or not) slices of pickled jalapeno
1 can of Great Northern beans - do not drain
Add oil to a large skillet. Slice onions and saute with jalapenos over low heat until translucent. Adjust heat to medium, wait until pan is hot and add chicken breasts. Sear chicken until golden brown on both sides (3-5 minutes) and onions have caramelized. Reduce heat to low. Add barbecue sauce and beans. Simmer over low heat, stirring occasionally, until chicken is tender (at least 30 minutes) - the longer it cooks, the better the flavors marry.
Serves two, but would easily stretch to three or four with the addition of a couple more chicken breasts and another can of beans.
I served it with homemade bread and butter for mopping up the gravy, and a tossed salad. Sorry, no picture. The steam from the pan kept fogging the camera lens and I finally gave up. I guess I could have taken one of my plate, but by the time it was on the table I was too hungry to be thinking about photography!
Showing posts with label recipes. Show all posts
Showing posts with label recipes. Show all posts
Tuesday, January 29, 2013


Friday, December 21, 2012
Cookie Jar Gingersnaps
When I was in grade school back in the not-quite-dark ages, we used to get these saucer-sized, rich-with-molasses and rolled in sugar, crackle-topped cookies every now and then for dessert with school lunch. I loved them. They had that crunchy-stiff outer edge and a slightly chewy middle... yum. Once I learned to bake, I started looking for a recipe and this one is about the closest I've found.
It also has the benefit of being relatively quick and doesn't require a lot of complicated fiddling. I don't make them hand-sized, because that's a LOT of cookie - and the big ones don't fit in a normal-sized coffee mug. ;-)
Cookie Jar Ginger Snaps
My sister always asks for these in lieu of a Christmas present; she's the sugar cookie baker in the family, so we swap! They're good right out of the oven, but the spices get stronger as
they're stored - so they get better and better until they're gone - they keep well and they don't crumble when packed up and sent USPSing across country, either.
It also has the benefit of being relatively quick and doesn't require a lot of complicated fiddling. I don't make them hand-sized, because that's a LOT of cookie - and the big ones don't fit in a normal-sized coffee mug. ;-)
Cookie Jar Ginger Snaps
Cream together
- 1/2 c. soft shortening (butter flavor Crisco works well)
- 2 c. sugar
Beat in:
- 2 eggs
- 1/2 c molasses (blackstrap, or the darkest you can find unless you like a lighter cookie)
Sift together... and then add to moist ingredients and blend well:
- 4 c. flour
- 2 T. ginger
- 1/2 t. salt
- 2 t. cinnamon
- 2 1/2 t. baking powder
Roll into balls the size of a walnut. Roll in white sugar. Place 2 1/2" apart on parchment paper lined cookie sheet. Bake at 350' for 12-15 minutes. Store in airtight container. Yield: 4-5 dozen.
 |
| Molasses-y goodness |
Enjoy!!!
Monday, December 10, 2012
Morning Baking
Soup and baking. Two delicious reasons to love fall/winter months. Today will be a chilli day, and the house already smells like pumpkin bread.
The kitchen is chilly in the mornings. The best cure for that is something in the oven filling the air with heat and tasty smells. I have wonderful banana bread recipe, but since I ate the last banana Friday for breakfast, that was out. And my zucchini was frozen rock solid. But I did have can of pumpkin that missed out on being pie at Thanksgiving.
I've always wondered if I could substitute pumpkin for banana in the banana bread recipe and with a bit of tinkering, come out with something edible....
I suspect there might be a tad more than three bananas worth of pumpkin in a 12oz can, but what the heck - bananas come in all sizes, so there had to be some flexibility built into the recipe, right?
It makes a pretty loaf - sort of deep orange, with the bright red of the cranberries. I suspect I probably could have added an extra 1/4-1/2 cup of flour, and an hour of baking time wasn't quite sufficient, but an hour and a quarter saw it done. It's definitely best to let it cool in the pan, and it cuts better when it's been chilled in the refrigerator for a while, but all in all I'm pleased with the result, and I think with the extra flour it would even be company-worthy. But possibly as muffins.
Good thing we have all these nice neighbors/relatives that stop by for coffee.
The kitchen is chilly in the mornings. The best cure for that is something in the oven filling the air with heat and tasty smells. I have wonderful banana bread recipe, but since I ate the last banana Friday for breakfast, that was out. And my zucchini was frozen rock solid. But I did have can of pumpkin that missed out on being pie at Thanksgiving.
I've always wondered if I could substitute pumpkin for banana in the banana bread recipe and with a bit of tinkering, come out with something edible....
I suspect there might be a tad more than three bananas worth of pumpkin in a 12oz can, but what the heck - bananas come in all sizes, so there had to be some flexibility built into the recipe, right?
Banana Bread
- 1 stick butter/margarine, melted
- 3 ripe mashed bananas
- 2 eggs
- 1 tsp vanilla
- 1 cup sugar
- 2 cups flour
- 1/4 tsp salt
- 2 tsp baking soda
- 1/2 cup nuts
Combine butter, bananas, eggs, vanilla and sugar and stir until mixed. Add flour, salt, baking soda and stir together. Add nuts and stir until just mixed. Pour into greased bread pan and bake at 350' for one hour.So... I substituted the canned pumpkin for bananas, added 1 1/2 tsp cinnamon and 1/2 tsp cloves and since I had about a cup of fresh cranberries left over from Thanksgiving, I added those in when I added the nuts.
It makes a pretty loaf - sort of deep orange, with the bright red of the cranberries. I suspect I probably could have added an extra 1/4-1/2 cup of flour, and an hour of baking time wasn't quite sufficient, but an hour and a quarter saw it done. It's definitely best to let it cool in the pan, and it cuts better when it's been chilled in the refrigerator for a while, but all in all I'm pleased with the result, and I think with the extra flour it would even be company-worthy. But possibly as muffins.
Good thing we have all these nice neighbors/relatives that stop by for coffee.
Monday, November 12, 2012
White Bean Chilli - new favorite - YUM!
It's soup weather again! And I think I have a new favorite.

When it's nicely browned, add all of the canned ingredients - I didn't drain anything, just dumped them in - and bring to slow boil. (If the bean you use are on the dry side, you may need to add some water.) Add pasta. Simmer at least half an hour or until the pasta is done - the longer it cooks, the better the flavor. Add pepper/salt to taste. I don't like a lot of salt, so...
I served it with a sprinkle of Parmesan cheese (ode to cheddar on traditional chilli). Should have taken a picture when it was all hot and bubbly in the pot last night, but it's darn tasty warmed up for lunch today, too!

White Bean Chilli
- 1 tbsp oil
- 1lb ground beef/venison/meat
- 1 medium onion
- 2 stalks celery
- 1 large can stewed tomatoes
- 1 can original Rotel/tomatoes w/ hot peppers
- 1 can white kidney beans
- 1 can navy beans
- 1 can Great Northern beans (Limas)
- 1 cup wh. wheat macaroni pasta
- pepper and Parmesan cheese to taste
When it's nicely browned, add all of the canned ingredients - I didn't drain anything, just dumped them in - and bring to slow boil. (If the bean you use are on the dry side, you may need to add some water.) Add pasta. Simmer at least half an hour or until the pasta is done - the longer it cooks, the better the flavor. Add pepper/salt to taste. I don't like a lot of salt, so...
Saturday, December 3, 2011
Cookies!
Not the horse kind, either. Although the day is young yet...
Yesterday I made my annual batch of fruitcake. Don't hate - my family likes it! I have an ancient Betty Crocker cookbook I inherited from one of my grandmothers, and it has a whole page of fruitcake recipes. I always use the base recipe, but depending on what a) sounds good at the moment, and b) what I have handy... I end up with something different every year.
Make them as you would Rice Crispie treats, stirring the chocolate chips in with the cereal and pressing them into a 13x9" pan while they're still warm. They're weirdly addictive.
This morning I managed to ignore the cats bouncing off me until 5:30 - hey, it's the weekend, I can sleep in a little, right? But once I was up and coffee was on, I figured why not get some more of the Christmas baking done.
These macaroons are C's favorites, and they'll be filling an exam care-package shortly.
Yesterday I made my annual batch of fruitcake. Don't hate - my family likes it! I have an ancient Betty Crocker cookbook I inherited from one of my grandmothers, and it has a whole page of fruitcake recipes. I always use the base recipe, but depending on what a) sounds good at the moment, and b) what I have handy... I end up with something different every year.
This year I went dark.
In addition to the traditional
citron, candied cherries and pineapple pieces,
citron, candied cherries and pineapple pieces,
walnuts and golden raisins, this year's batch has:
coffee, molasses, dried cranberries,
cinnamon, nutmeg, mace, and cloves, and
for "tart" jelly I used whole-berry cranberry sauce.
It bakes in a slow oven,
so the house smelled wonderful
all yesterday afternoon and into the evening.
While the first batch was in the oven I tackled the package of gingerbread marshmallows someone thought I would know what to do with. I'm not sure what exactly you'd call the result, but they're tasty...
 |
| Cinnamon Cereal Ginger-People Bars |
1 package gingerbread marshmallow people
2 cups mini-marshmallows
1/4 cup butter
6 cups cinnamon squares ceral
1 cup mini-chocolate chips
Make them as you would Rice Crispie treats, stirring the chocolate chips in with the cereal and pressing them into a 13x9" pan while they're still warm. They're weirdly addictive.
This morning I managed to ignore the cats bouncing off me until 5:30 - hey, it's the weekend, I can sleep in a little, right? But once I was up and coffee was on, I figured why not get some more of the Christmas baking done.
These macaroons are C's favorites, and they'll be filling an exam care-package shortly.
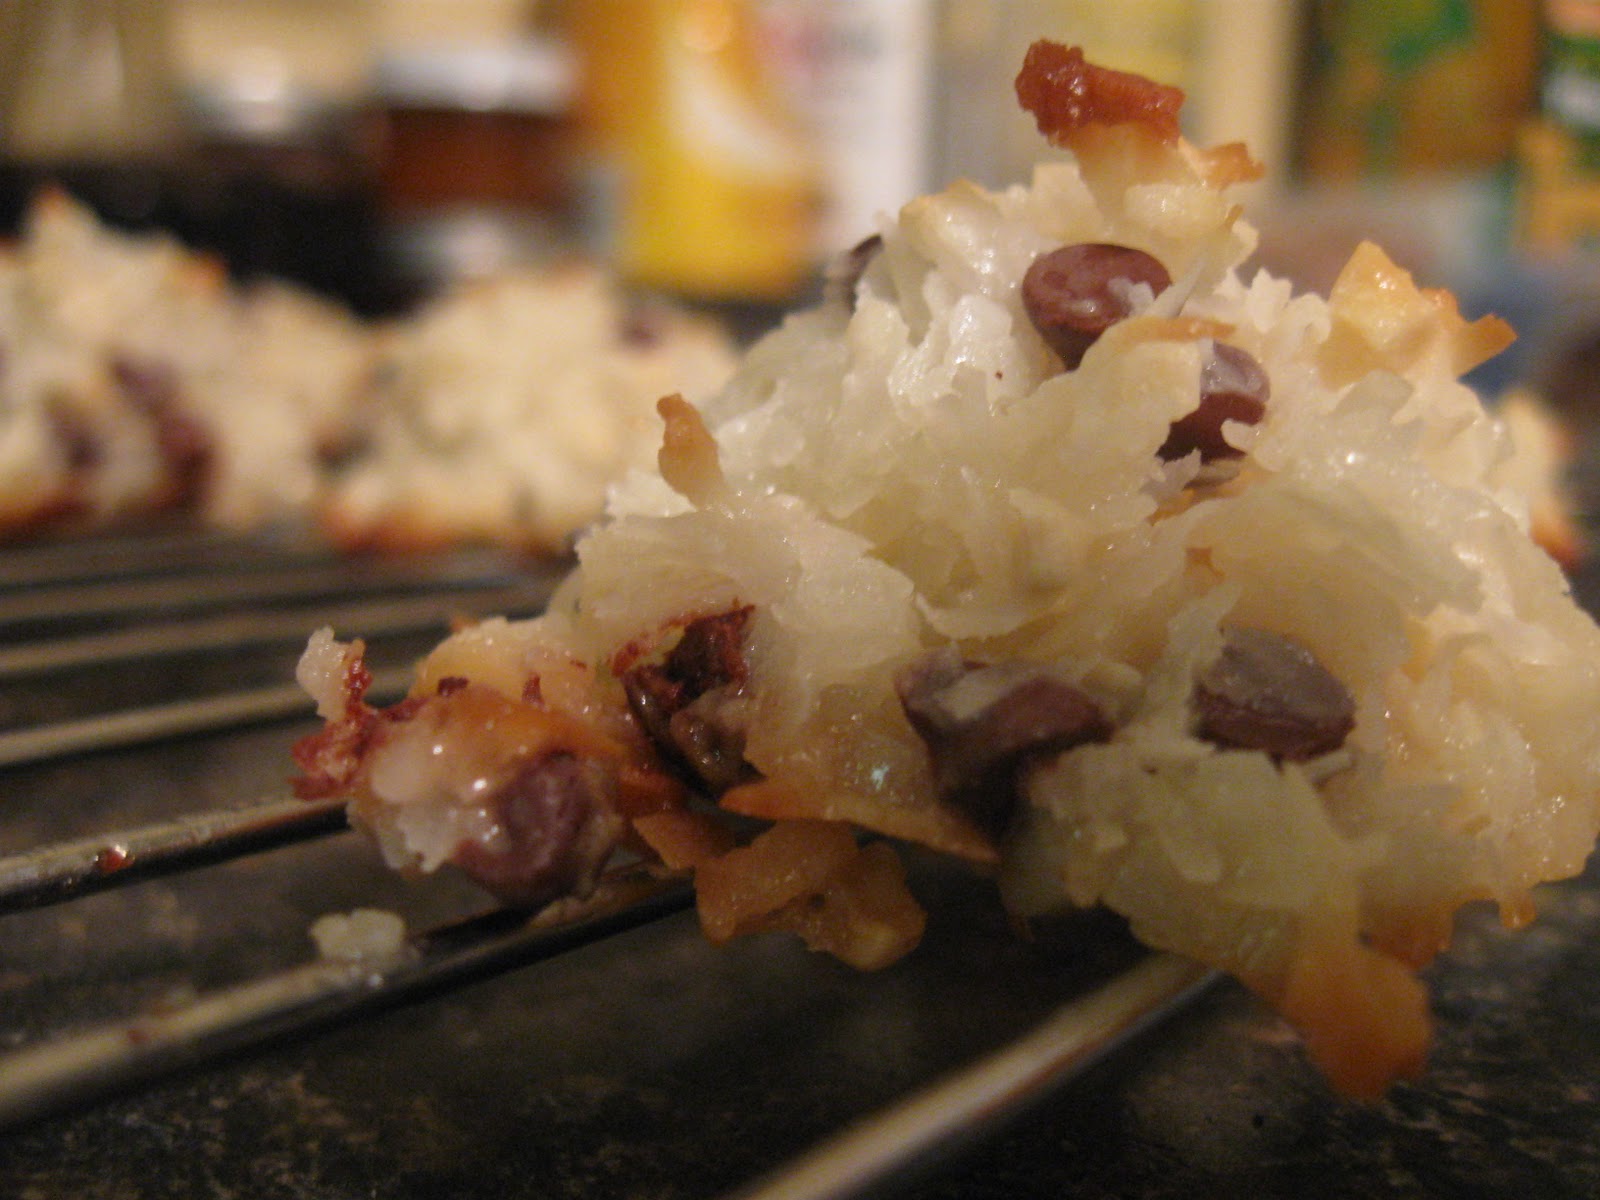 |
| Almond Joy Macaroons |
1 package shredded coconut
1 can sweetened condensed milk
2 teaspoons vanilla
1 1/2 teaspoons almond extract
1/2 package (or so) mini-chocolate chips
1/2 cup chopped almonds
350' oven for 8-10 minutes
**The secret to these is parchment paper
and letting them cool on the pan for 1-2 minutes.
DO NOT
make them without parchment paper
unless you LIKE swearing... a lot.
Chocolate chip cookies, just because I like them... well that, and I had all the ingredients.
 |
| Milk & dark chocolate chips with big chunks of walnut - YUM |
I use the recipe off either the Baker's
or Ghirardelli's chocolate chips.
This time it was Baker',
This time it was Baker',
but they're both good.
 |
| I should probably title this post "Thank you, Sunbeam" |
The next ones are for my sister. I've been sending these to her for Christmas for a number of years now. Not long after she was married I sent her her traditional tin. Her husband, who apparently couldn't remember if he'd had them before asked her if he liked them...
Her answer, "No, you don't." - LOL!
 |
| Cookie Jar Ginger Snaps |
Pretty, aren't they? They taste darn good, too!
Now I have to scramble if I want to get everything mailed.
Sunday, September 28, 2008
Pasta for a horde (or for yummy leftovers)
I've never tried making those big pasta shells before, but someone shared a recipe that looked intriguing for stuffed shells with broccoli. Well, I made it last weekend. H said it needed beef. T agreed, and said more cheese wouldn't hurt. I also discovered that I wasn't supposed to use the whole box of shells, so I'd cooked too many and needed to make more stuffing.
On the plus side, no one complained about the broccoli....
So here's the doctored version - with beef, more cheese(s), family-approved. It makes a LOT. I'm thinking it may be a great potluck dish, too.
On the plus side, no one complained about the broccoli....
So here's the doctored version - with beef, more cheese(s), family-approved. It makes a LOT. I'm thinking it may be a great potluck dish, too.
Broccoli stuffed shells with Meat Sauce
1 package large shellsIt's not exotic, it reheats very nicely, and makes wonderful leftovers, too. And it will feed at least 6-8 (depending - if you have a whole crew of hearty eaters, possibly less). Leave the beef out & it's vegetarian - although definitely not a meal for the lactose intolerant!
2 jars pasta sauce of choice (I like Newman's Own with mushrooms....)
1 16 oz. container of ricotta cheese
1/2-1 cup parmesan cheese
1 12 oz package shredded mozzarella
1 12 oz package shredded Italian blend
1 1/2 tsp. Italian seasoning (or mix of basil & oregano)
1/2 16 oz package of frozen brocolli
1 lb ground beef (more or less)
2 T dried onion flakes
pepper to taste
1/2 cup water (depending on sauce thickness may need a bit more or less)
Preheat oven to 375'. Brown ground beef. Add 1 can sauce & let simmer. Cook whole box of shells according to package directions. Defrost broccoli & mix with ricotta, parmesan, & half of each mozzarella & Italian cheeses, dried onion, Italian seasoning & pepper. (May add salt to taste, but I found it didn't need any.) Put about 1 cup of sauce on the bottom of a large baking dish (12" x 18" - I think) & spread it around.
Stuff cooked shells with cheese mixture & arrange in a single (double for smaller pan) layer in the baking dish. Pour simmered beef & sauce mixture over the stuffed shells. Pour the remainder of the cold can of sauce on top. Add the water - I swished out the sauce jars & used the result - pouring around the edges so that the cheese mixture in the shells isn't drowned. Top with the remainder of the mozzarella & Italian cheese. Cover with foil & bake for 25 minutes. Remove foil & pop back in for another 5-10 minutes until the top is golden brown. Remove from oven & let rest 5 minutes before serving.
Serve with vegetable of choice, salad & bread sticks.
Subscribe to:
Posts (Atom)